Many times you have seen Google results with extra information that attracts and push you to click that website link. That extra information can be in form of rating of a product, events information, Geo locations etc. Google name that extra information as “Rich Snippet” because it has information that those normal search snippets do not have. See the images below.
Have you ever wondered how this happens? How search engine find such information and show them in this systematic way?
This is something called Semantics Integrations which can be achieved by integrating micro-data (Schema Markup – recommended by search engines), micro-formats and/or RDFA.
[the_ad id=”6392″]
In rest of the article you will learn;
What is Schema?
Schema is a markup, added to HTML of a webpage; that allow major search engines to develop their understanding for a webpage. For instance:
A website has two webpages. One page is about “Avatar – Movie” and other is about “Avatar – Icon (picture) representing a person”. When search engine crawls both the pages, how it will differentiate them?
Here comes in the Magical Schema Markup that does this job. It develops the semantics of a webpage and makes search engines able to store webpage context in their databases. Now on a user query most relevant page will be served.
What Schema Markup can do for Your Website?
Importantly;
- Schema helps in increasing Click Through Rate
- It allows search engines to develop context of your website and webpages
- Search engines prefer such pages to show in their result pages
- Much more
Schema Markup Brings more Traffic to Your Website
Yes! With schema you can enhance CTR of your webpages; resultantly your website traffic will increase. According to Search Engine Land data you can boost CTR and traffic to your website up to 30%.
Do not believe it? Think like a user. You are searching for a product or service e.g. “Hotels in Philadelphia”. You see two different results. A result with star rating and some extra information related to your query and other with normal Meta description.
[the_ad id=”6396″]
Which website you will go for? Definitely the second one as it has information that is building your trust. You can achieve above results by implementing relevant itemtypes and itemprops on your webpage. See the code below.
Learn how to Implement Schema Markup on your Website
Are you ready to boost your website traffic? Let’s grab the other bits. Don’t worry! It’s not a rocket science, its computer science ☺. Just follow the steps.
The most important thing; what markups you want to implement on your website?
First way is to explore Schema.org and find markups that suit to your website/pages. The easy way is to implement what your competitor has implemented, but, in better way.
The “First Way”
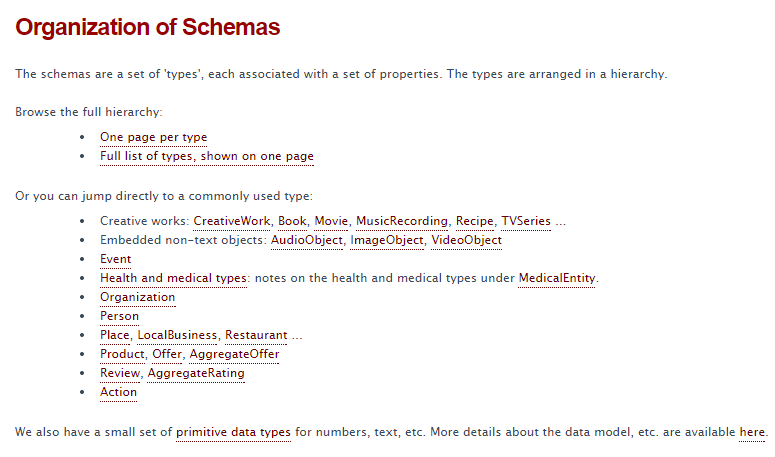
Open schema.org and find schema attributes that suits your webpage. 
[the_ad id=”6394″]
The “Easy Way”
- Find the top competitor which has implemented schema
- Download and install Webbee SEO Spider on your computer
- Enter competitors’ website URL
- Start the crawl
- Go to the schema tab

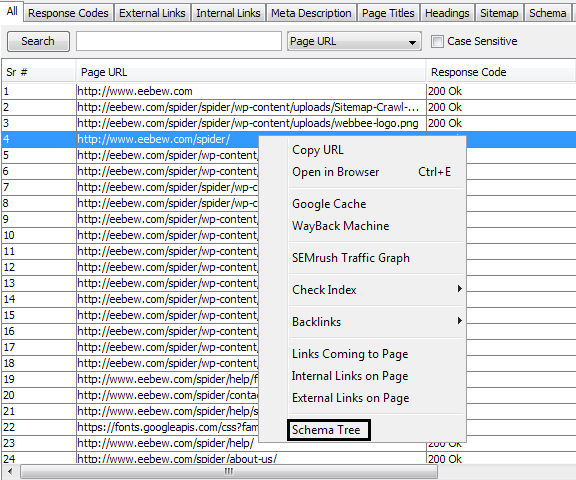
- Right click the URL in table where schema has found
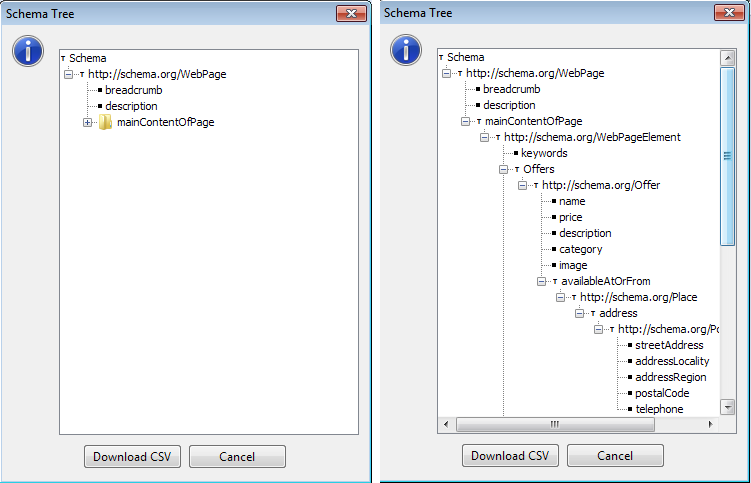
- Select Schema Tree from the popup menu
- Download the schema
That’s it. Now you have schema information of your competitor. You can add other markups as well in your list that you think your competitors are not implementing but they are necessary to fully explain your webpage.
[the_ad id=”6397″]
And now it is time to learn how to implement selected schema markups
Step 1
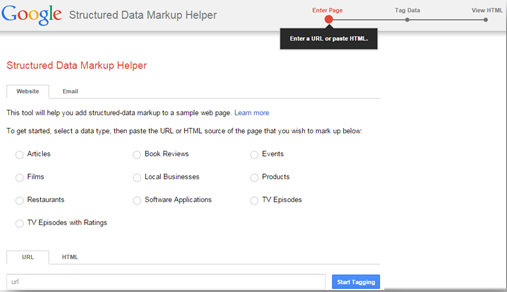
Go to Google Structured Data Markup Helper
Step 2
Select desired markup type from options. Here you can see generic and commonly used types only (explore schema.org for full listing). Choose one of them according to your webpage type.
Let’s say I want to implement schema on my webpage https://eebew.com/spider/user-guide/optimized-seo-strategy/. That is an article page. So, I am selecting “Article” type.
Step 3
Copy and paste article’s URL (in URL section) where you want to implement schema. You can also put HTML in HTML section instead of URL.
The page will load in markup tool and provide the platform to markup your webpage according to your input.
Step 4
You can see two sections; data items on right side and web page on your left side. Now you just have to highlight the data to add markup.
[the_ad id=”6395″]
In right section there are many data items, here I am going to explain main points one by one for your ease;
Name
When you highlight your page title, a pop up will appear and select ‘name’ that will represent as article title.
Author
Highlight author name and select ‘Author’. It will represent the name of the author who wrote this article.
Date Published
Highlight date of your article and select ‘Date Published’. It will represent the date when your article was published.
Image
If your article has an image highlights it and select ‘Image’. It is also the representation of the article image.
Article Section
Article section is the start of your article. Highlight from where your article is starting and select ‘Article Section’. You have to highlight same as for other data items according to your requirement.
Important: You can also add data items that are not present on your webpage (in my case) like date published, author and, importantly, your article URL which is not showing on your article. For this you can use “Add Missing Tags” option at the end of your right side.
For Example I want to add URL. On click ‘Add missing tags’ button a new window will pop up.
Now I have to select tag type as ‘URL’ and paste my desired URL in ‘Add tag’ section. After adding it I just saved it and my URL has added now in data items section.
[the_ad id=”6398″]
Step 5
Next step is to create html. Don’t worry! It’s also very simple. You just have to press red button “Create HTML” to convert it into HTML. When button pressed, it will show you HTML with schema markup code.
In this section you can view the place where schema has implemented by clicking on yellow spot on your right side.
Step 6
Download the html code.
Step 7
Before making this page live you should verify this code in another free tool provided by Google Structured Data Testing Tool.
Open your webmaster tool and find “Structured Data Testing Tool” under “Home” in left navigation bar on your screen. You can see two options there; one is URL and 2nd is HTML. Choose what suits you.
Paste the html code that you have just downloaded.
Press the “Preview” button to see the results.
Everything is white? Congratulations! You have created your first error free schema. Just paste this code in your webpage and make it live.
Happy Marketing ☺
Other Resources |
|
|---|---|


Great post! Thank you for explaining some of the nuances of Schema/Markup language.
A few questions, if you have time to answer:
1) For a WordPress site, which Schema plugin do you recommend using in terms of robustness, stability, etc.? Obviously this can change in the future (!) but there are lots of plug-ins which don’t necessarily seem to get those extra rich snippets in the search engines for local phrases even after following the plugin’s instructions.
2) If a local business serves a 20-30 mile radius, but that radius accounts for several towns, how does one use Schema on town-specific pages? For example, if a job was performed in a town 10 miles away, and there are some approved before/after photos (or even a slideshow video), then how can that multimedia be “marked up” with Schema apart from alt text, video optimization, and the title (and meta description) optimization for that specific town?
Many thanks for your help, and again you did a great write-up!
Thanks Matt for your interest.
1 – There are many plugins available in market (Plugin from Yoast) that allow you to add schema on you webpage for wordpress but in my career I have not found any that allow to use specific schema markups on a webpage. I would rather prefer to create schema from external resource, just like I explained in the article, and would add it in my post (You see when you create a webpage in wordpress you have an option to use text i.e. HTML as well).
2 – For local business targeting you can use schemas available for LocalBusiness i.e. http://schema.org/LocalBusiness There are plenty of item types and item properties listed by schema.org on this page. For instance, I have a ecommerce product on my webpage (with images and/or video, price etc) and want to target it in Durham, west Virginia. What i supposed to do? I’ve a code snipped for you. This is just an example.
Other item properties that you can use are addressLocality, addressRegion, areaServed, faxNumber, postOfficeBoxNumber just in case if you want to be more specific.
Thank you for the reply on the code! I also appreciate the explanation as to why you do your own code and then add it versus using a plugin.
That clarifies a few questions I had. Again, many thanks!
I never know that schema implementation can be that much easy, especially the schema markup scrapping part from competitor’s url. Everything was ready made. The tool is really rocking. Nice share!
Excellent.
Great Article Asim, helps me like a charm. thanks
Naman, glad you found the post helpful.
Pretty! This was a really wonderful post. Thank you for your provided information on Schema Implementation.
Humberto you are welcome. I’m glad you found it useful.
Hey, is schema markup the reason that some search results show up in a big box above others in Google at the moment? For instance my competitor’s webpage is showing in a big box above all the other search results. Specifically noticing this for definitions and medical terms among other searches.
No, its not the schema. It’s the knowledge graph that Google shows at top result for search queries. There are no specific rules to get a knowledge graph for your website. It’s the Google that decides to show one or not.
That is a really good tip of schema implementation, particularly to those fresh to the blogosphere.
Brief but very accurate information… Thanks for sharing this one.
A must read article!
Rob, thanks for the appreciation.
I need to thank you for this good read on Schema Markup! I absolutely loved every little bit of it. I have bookmarked your website and waiting for new stuff.
Hi,
What do you mean with “Just paste this code in your webpage and make it live”. Where exactly will you paste it if you’re using WordPress?
Thanks! 🙂
Yeah. WordPress comes with many complexities. And it is also dynamic so you may not be able to paste this code unless you know the web development/php. A good way to implement schema in WordPress is to use plugins. They are very handy I tell you.
Hello Asim!
I’ve been researching about Schema markup for a while now and I came across sites that are too technical. Your article made things clear. I didn’t know that the implementation of this is very easy.
Thank you for your help!
Aira, Glad the article was helpful. Let me know if I can help further.
Expert long-term care strategists provided invaluable guidance on Ohio medicaid eligibility requirements.